Introduction
This document describes a number of tutorial exercises to familiarize you with the features of the SimpleMES application.
The goal of these tutorials is to introduce basic features of an MES to you. These tutorials do not dig deeply into the all features. The basic purpose of each tutorial is:
-
Simple Order Processing - Introduction to running applications, define records, using dashboards and reports.
-
Assembly - Creating products with Bill of Materials, assembling components and displaying component history.
-
Scan Dashboard - Basic use of the scan barcode dashboard, printing traveller report.
-
Assembly Create New Product with components Create Order Release Start Assemble Components Display Assembly Info Display Component Usage Complete Display Order History Report
-
Barcode Dashboard Create Order for existing product with components Release Print Traveller Start in Scan DB Assemble Demo component Display Assembly Info Display Component Usage Complete Display Action Log Report.
Simple Order Processing
Logging In Define a Product Create the Order Release the Order Create a Dashboard Display the Dashboard Start/Complete the Order Display Order History Display Production Report
This tutorial covers using simple order processing. It starts with how to log in and run various applications. It demonstrates how you can create an order and track how it is processed on ths shop floor.
Logging In
-
Navigate to the home page (see Demo Server for the public demo server):
 Figure 1. Home Page
 -
Click the Login button. Enter user/password (admin/admin on demo server will work).
Define a Product
First you need to define a product to be built.
-
Click on the Products button to display the Product Definition page:
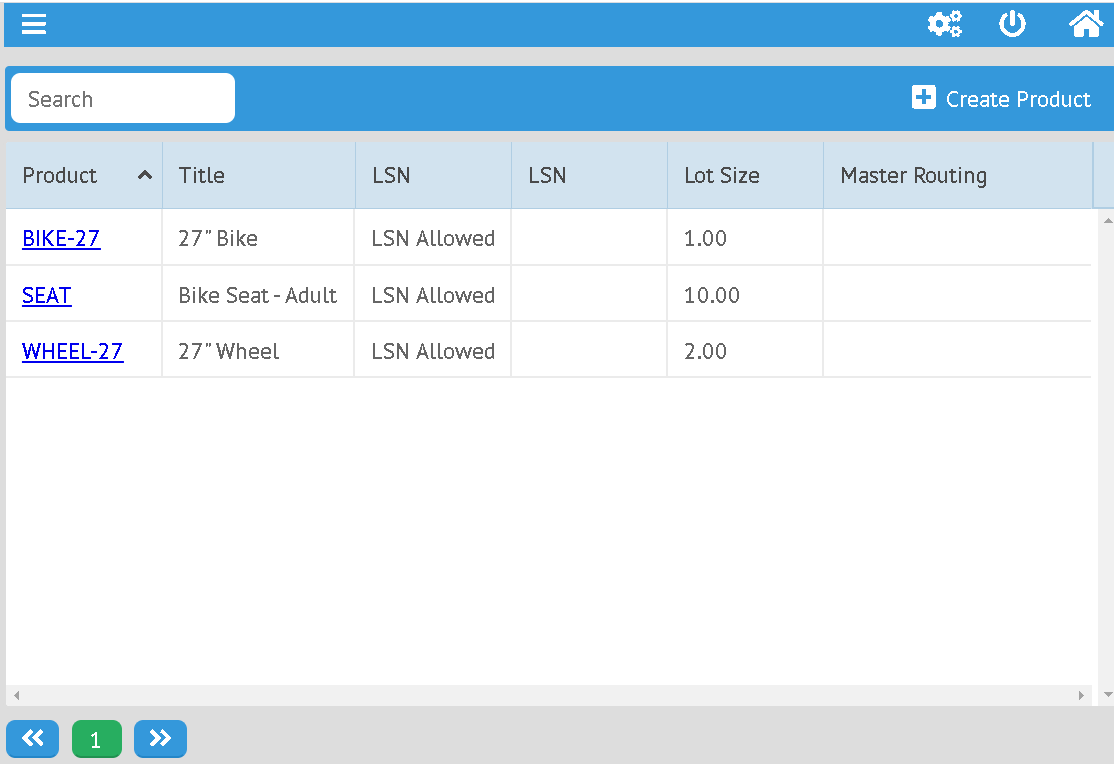 Figure 2. Product List
This displays the list of all products currently defined.
-
To create a new product, press the
 button. This displays the Create Product page:
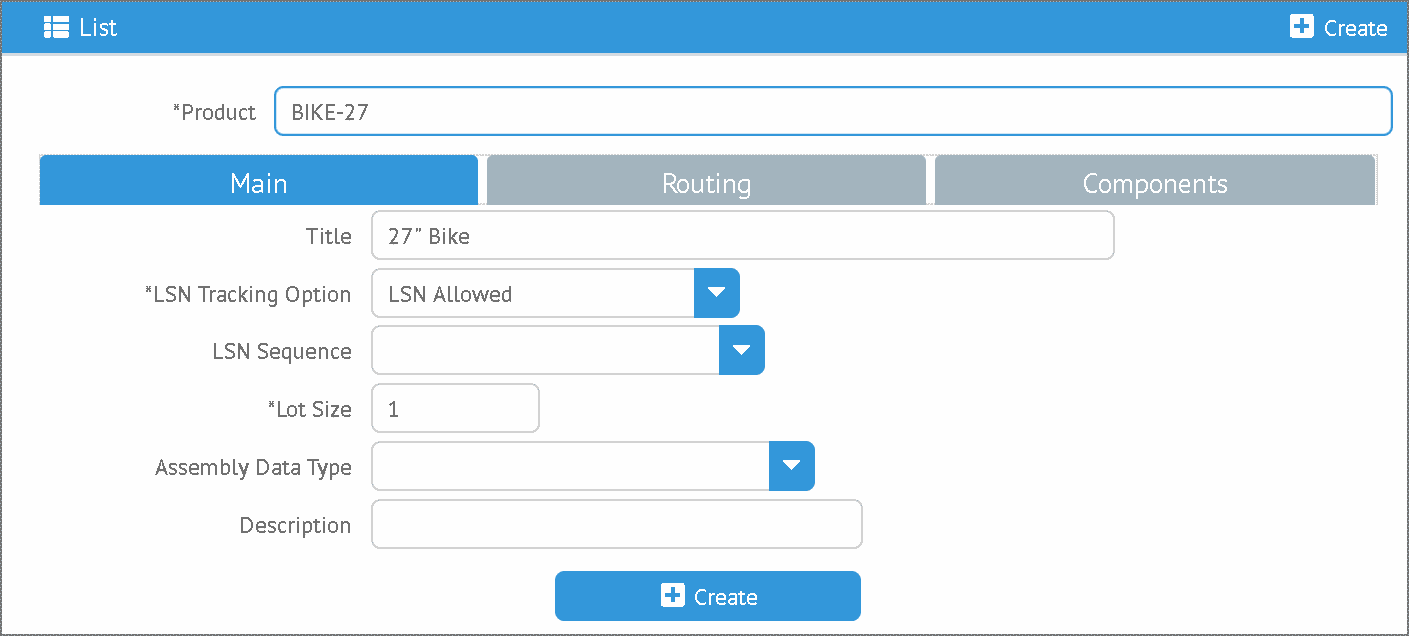 Figure 3. Create Product
 -
Fill in the required fields (marked with "*") and enter the
Title. Then press the button.
This displays the product in the Show Product page:
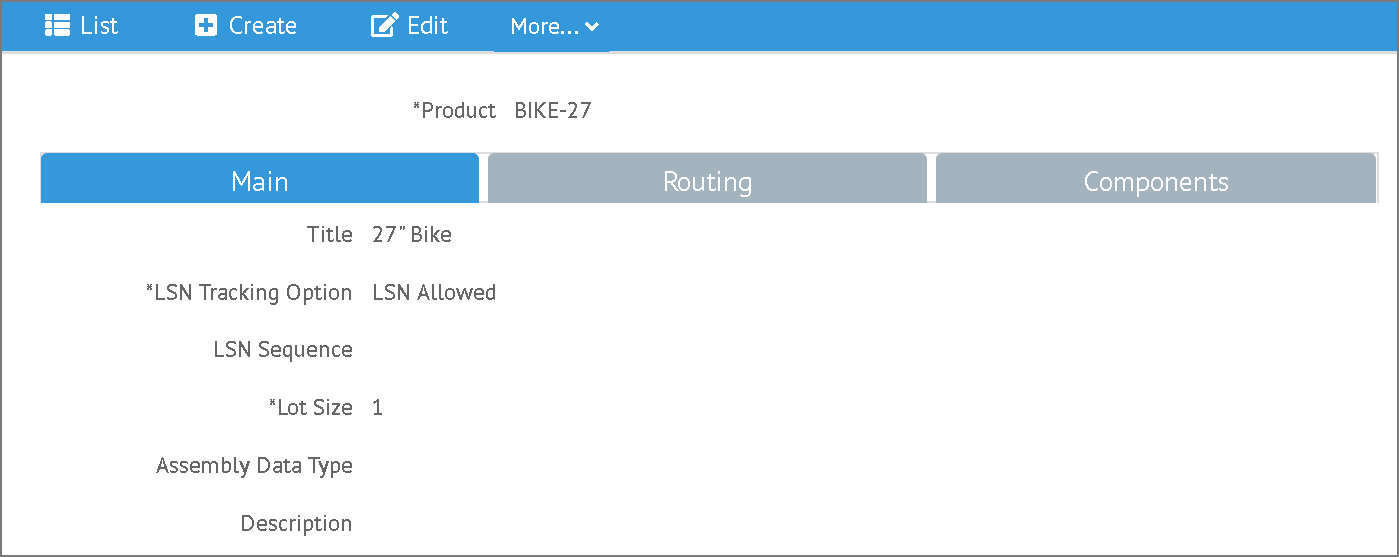 Figure 4. Show Product
Create the Order
Now, you need to create an Order.
-
You will need to open the Order List page using the Task Menu . Click on the
 button
in the upper left of the current page. You can also press F9 to display the task menu.
This displays the Task Menu popup:
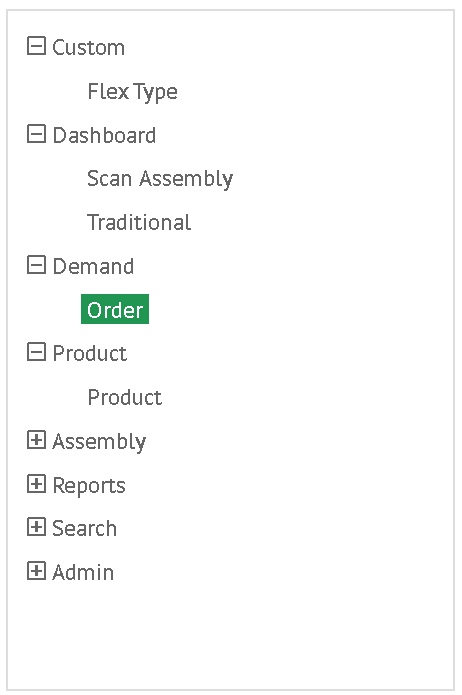 Figure 5. Task Menu
 -
Select the Demand → Order from the Task Menu to display the Order List page:
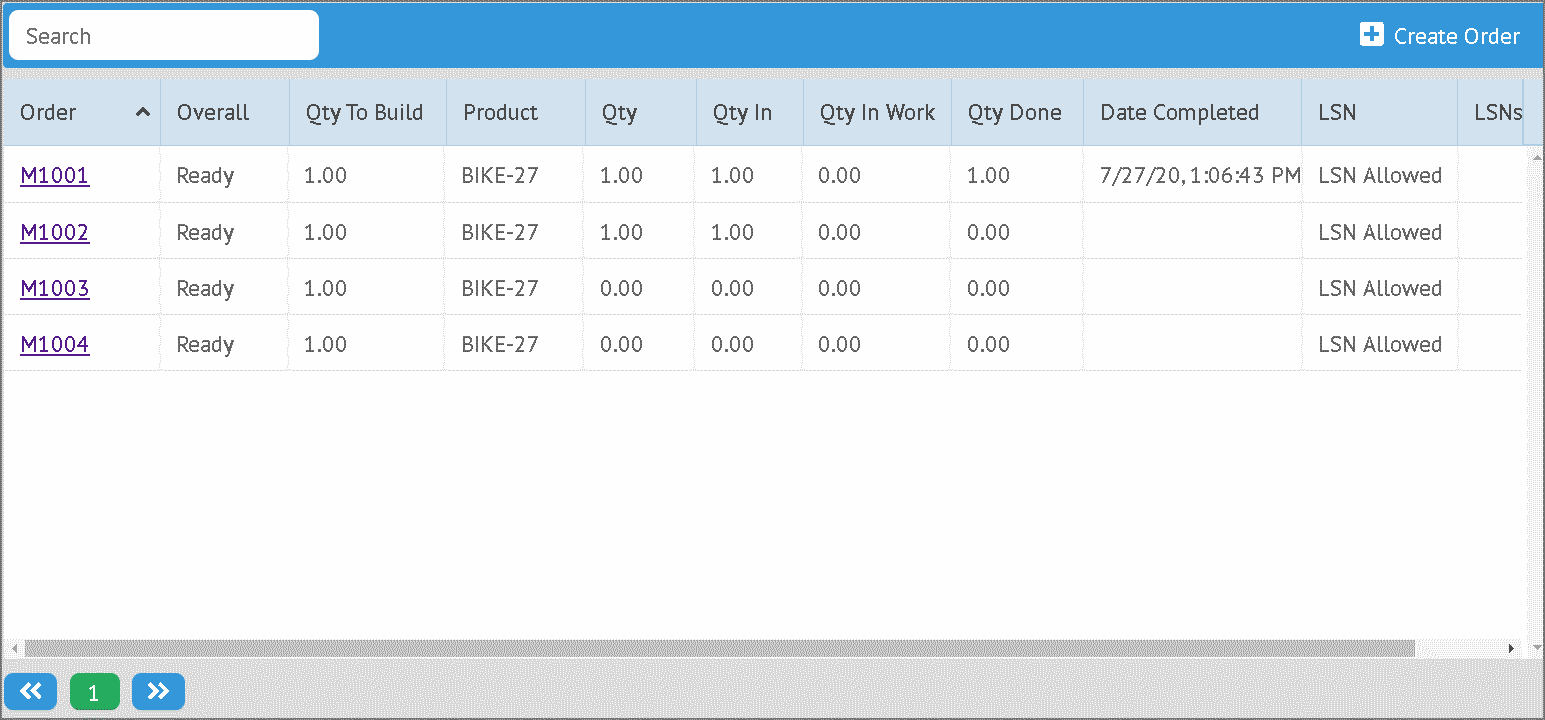 Figure 6. Order List
 -
To create a new order, press the
 button. This displays the Create Order page:
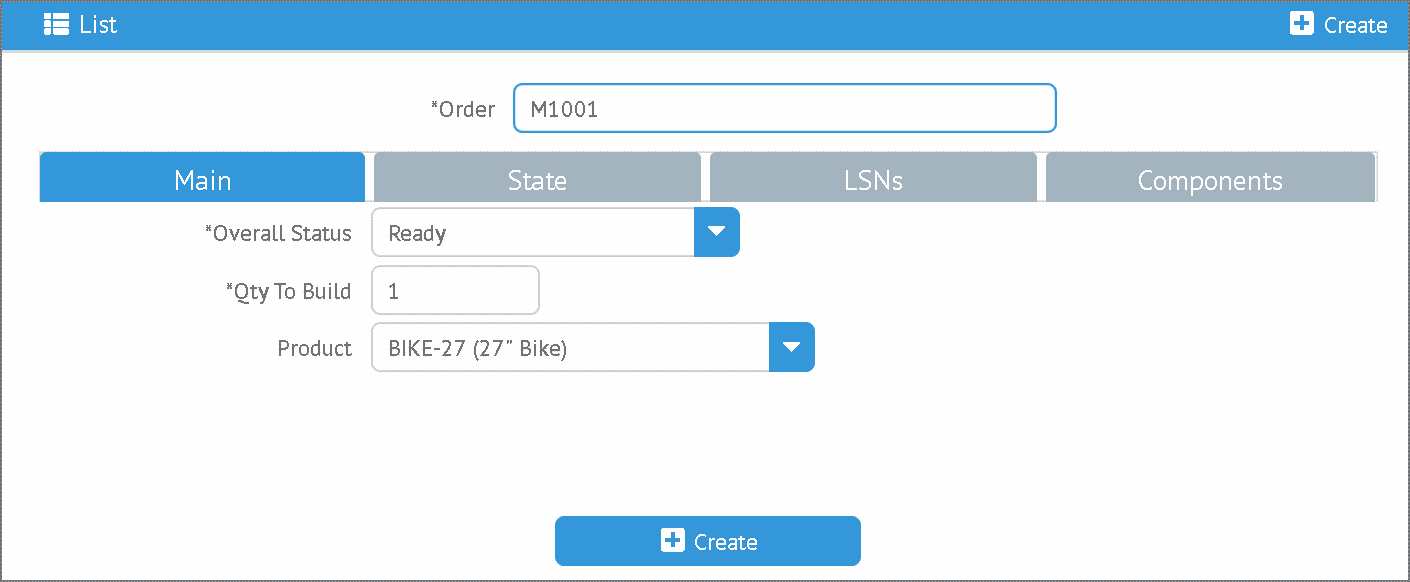 Figure 7. Create Order
 -
Fill in the required fields (marked with "*") and select the
Productyou created above (BIKE-27). Make sure theOverall Statusis set to Ready. -
Press the
 button.
This displays the order in the Show Order page:
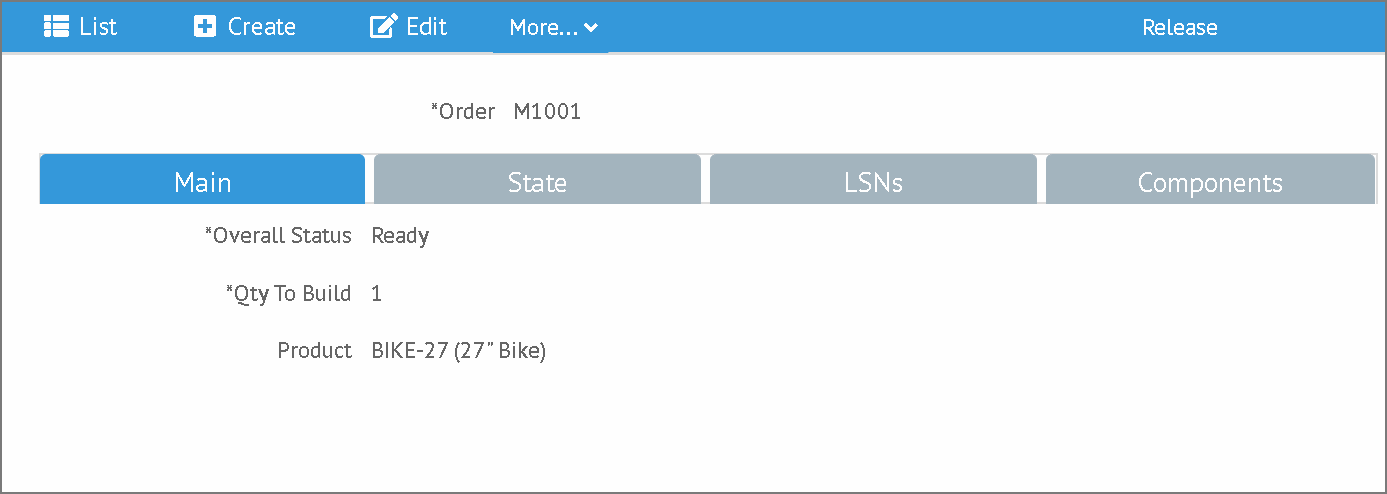 Figure 8. Show Order
Release the Order
The order has been created, but is not yet released to production.
-
If not on the Show Order page, navigate to it.
-
Press the
 button
(on the far right side of the toolbar).
This displays confirmation message:
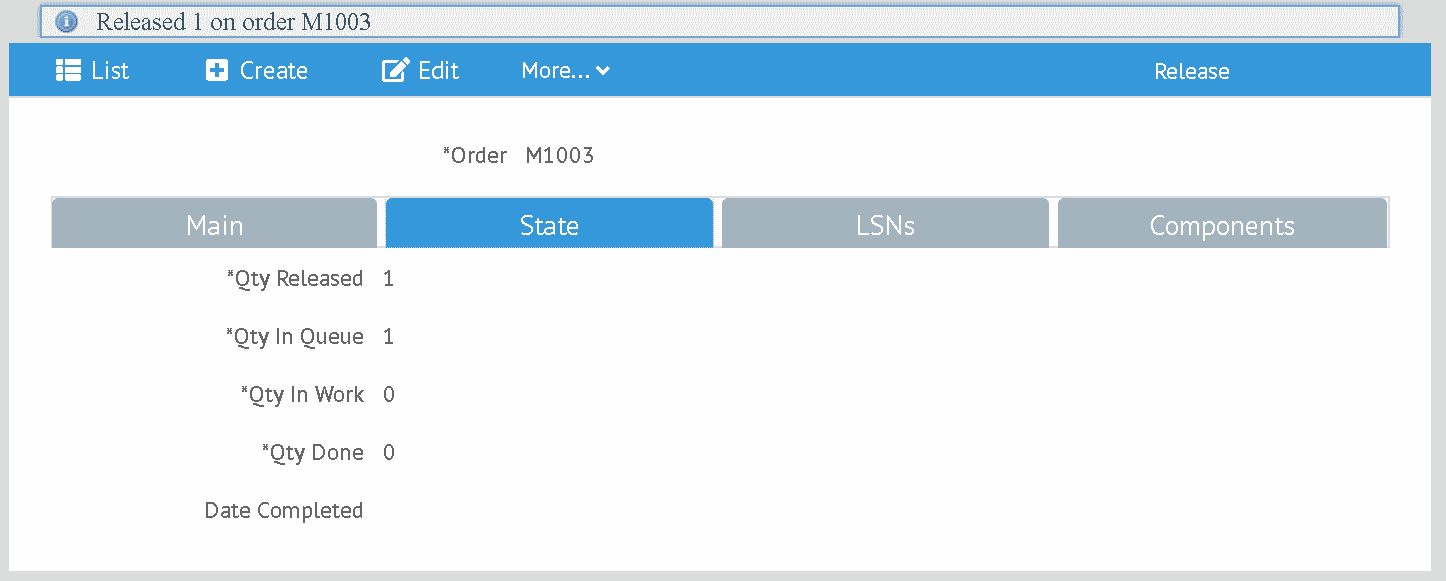 Figure 9. Order Released
 -
Click on the
 tab to see that the quantity to build has been placed in queue.
Create a Dashboard
Dashboards are the main interface used by shop floor operators to tell us what they are working on, what actions they are making and to display the order status.
These dashboards are created in a number of ways, but the easiest is to load the demo data.
-
In the browser, browse to the URL (Demo Server )
-
This will display the demo data loaded:
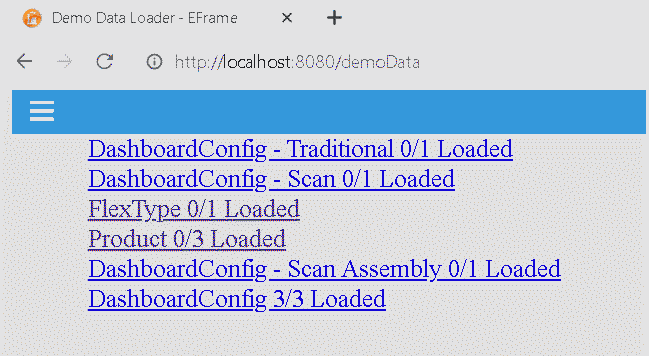 Figure 10. Demo Data Loader
| There are two variants of the dashboard: 'Operator' and 'Manager'. The 'Operator' variants are Scan Dashboard variants. The 'Manager' variants have a simple input field for the order/LSN input. |
Display the Dashboard
You can start a dashboard in a number ways, but the easiest is to select Manager Dashboard from the home page.
-
In the browser, browse to the home page ( Demo Server ).
-
Select Manager Dashboard from home page. This will display the Traditional manager dashboard:
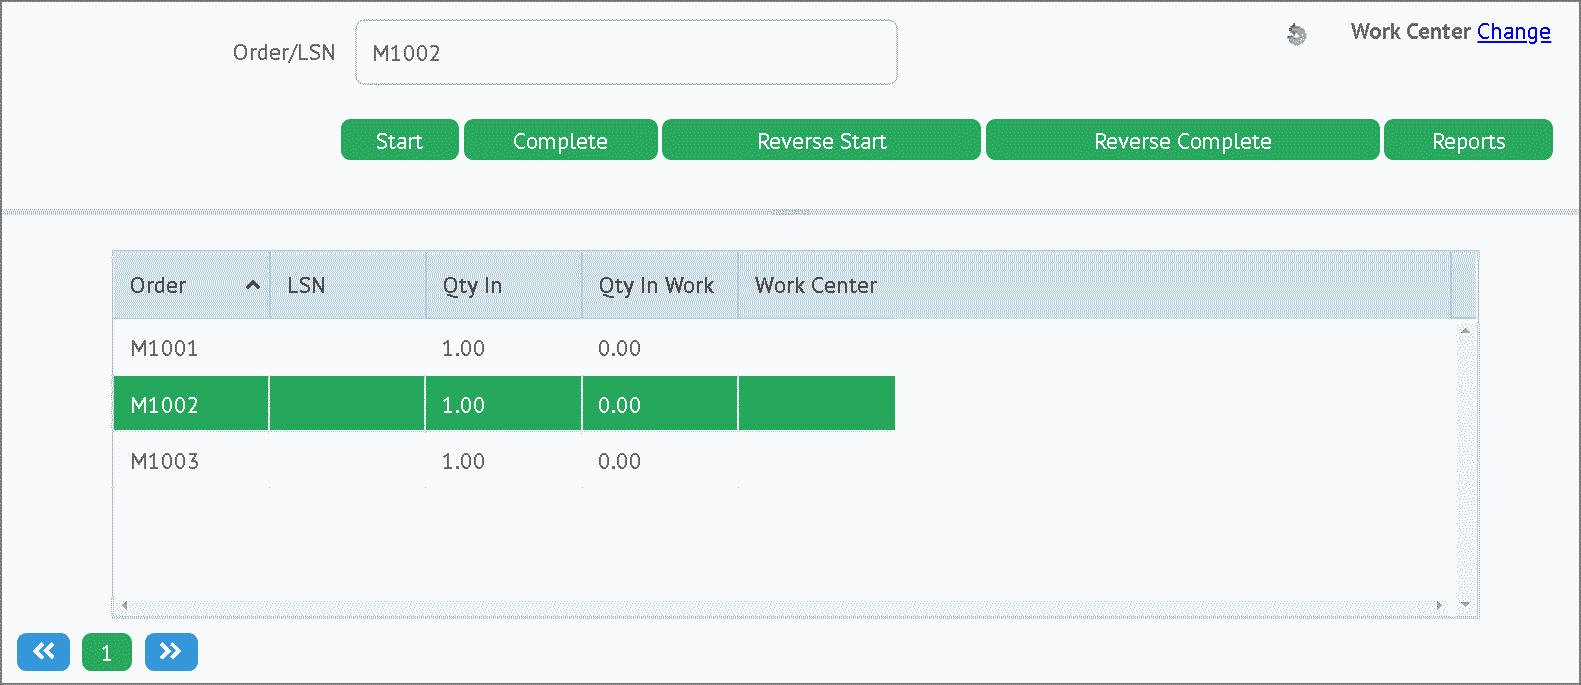 Figure 11. Traditional Manager Dashboard
This dashboard is designed for keyboard input of values and actions. Typically, it has Start/Complete buttons and buttons to reverse those actions. The lower panel displays the work list, which shows the orders with a quantity in queue or in work.
Start/Complete the Order
-
Display the dashboard (see Display the Dashboard).
 Figure 12. Traditional Manager Dashboard
 -
Select the order to Start.
-
Press the Start button. The started message will be displayed:
 Figure 13. Order Started
 -
Press the Complete button. The completed message will be displayed:
 Figure 14. Order Completed
Display Order History
-
Display the dashboard (see Display the Dashboard).
-
Select the order.
-
Press the Reports button.
-
Press the OrderHistory report button. This displays the Order History Report.
 Figure 15. Order History Report
This Order History Report will also show component Assembly history details, if defined.
Display Production Report
-
Display the dashboard (see Display the Dashboard).
-
Press the Reports button.
-
Press the ProductionChart report button.
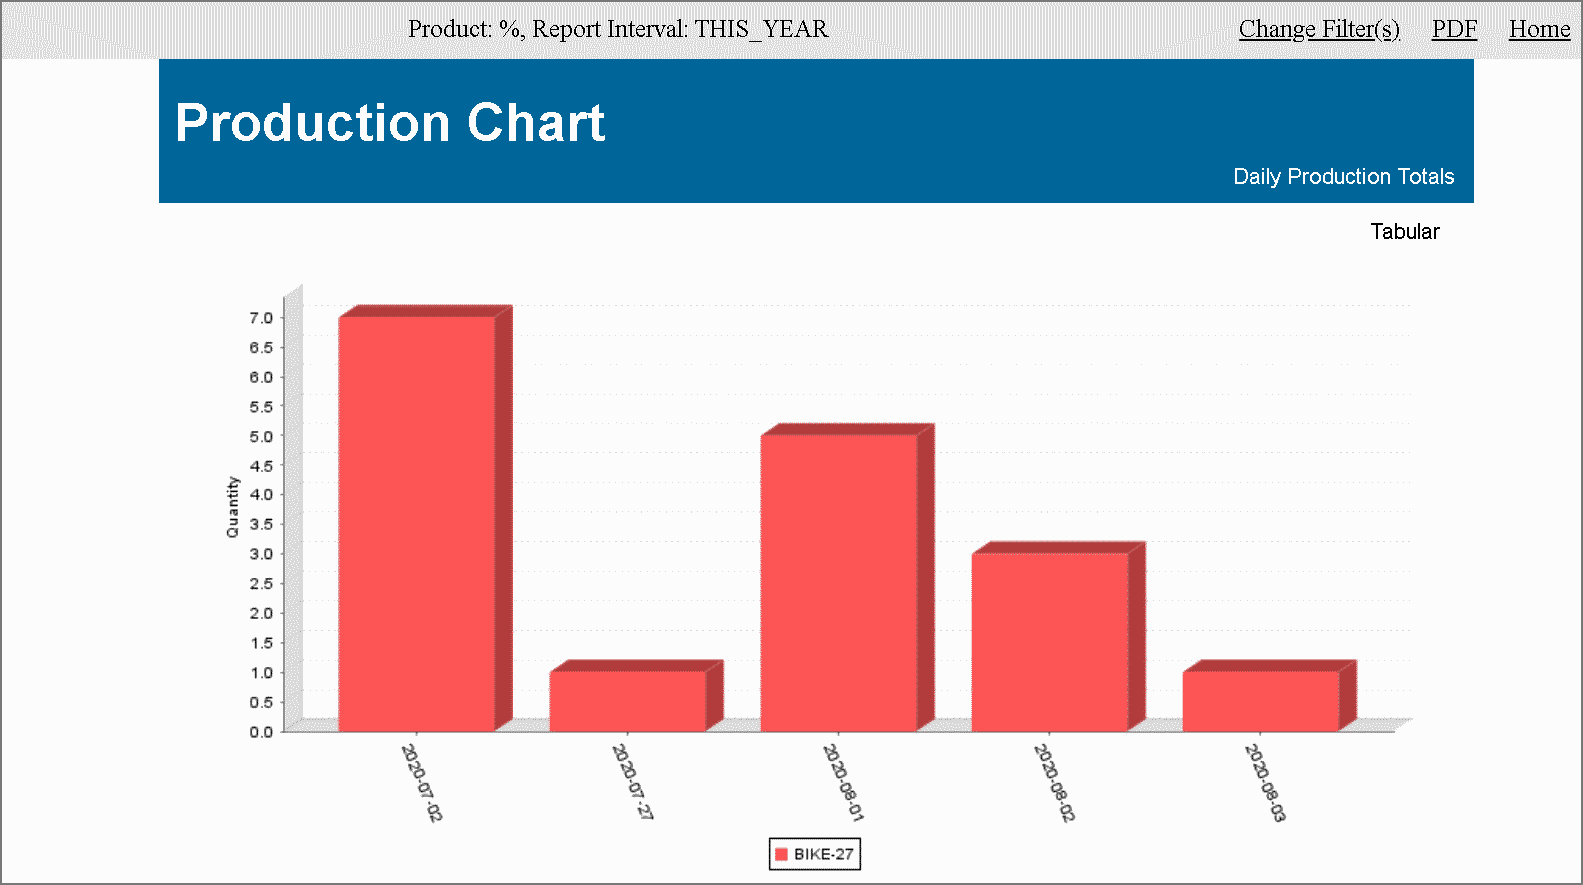 Figure 16. Production Chart
This chart shows the production for a period of time. The default time period is this calendar year. The report filters can be changed with the Change Filter(s) link. You can click on the bars in the chart for details on that date/product.
Assembly
Setup Define a Product Create and Release the Order Display the Dashboard Start the Order Assemble Components Display Order History Search for Component Usage
This tutorial covers basic processing and assembly using the normal, manual dashboard. See Scan Dashboard for details on how to assemble using a barcode-scanner and the scan dashboard.
Setup
Some setup is needed for this tutorial. You will need to follow these steps:
-
Create a Dashboard (Manager Assembly).
Define product
Next, you will need to define a product with some components. If you followed the Create a Dashboard steps above, then these products will be created:

The Bill of Material for the product BIKE-27 will require two components:
-
SEAT - Quantity 1 - Data Collected on Assembly: LOT.
-
WHEEL-27 - Quantity 2 - Data Collected on Assembly: LOT.
You can create your own product structure for this demo if you like, but the screenshots below will use the above structure.
Create and Release the Order
Now, you need to create an Order.
-
You will need to open the Order List page using the Task Menu .
-
To create a new order, press the
 button. This displays the Create Order page:
 Figure 18. Create Order
 -
Fill in the required fields (marked with "*") and select the
Productyou created above (BIKE-27). Make sure theOverall Statusis set to Ready. -
Press the
 button.
This displays the order in the Show Order page:
 Figure 19. Show Order
The order has been created, but is not yet released to production.
-
Press the
 button
(on the far right side of the toolbar).
This displays confirmation message:
 Figure 20. Order Released
Display the Dashboard
-
Open the Manager Assembly dashboard using the Task Menu :
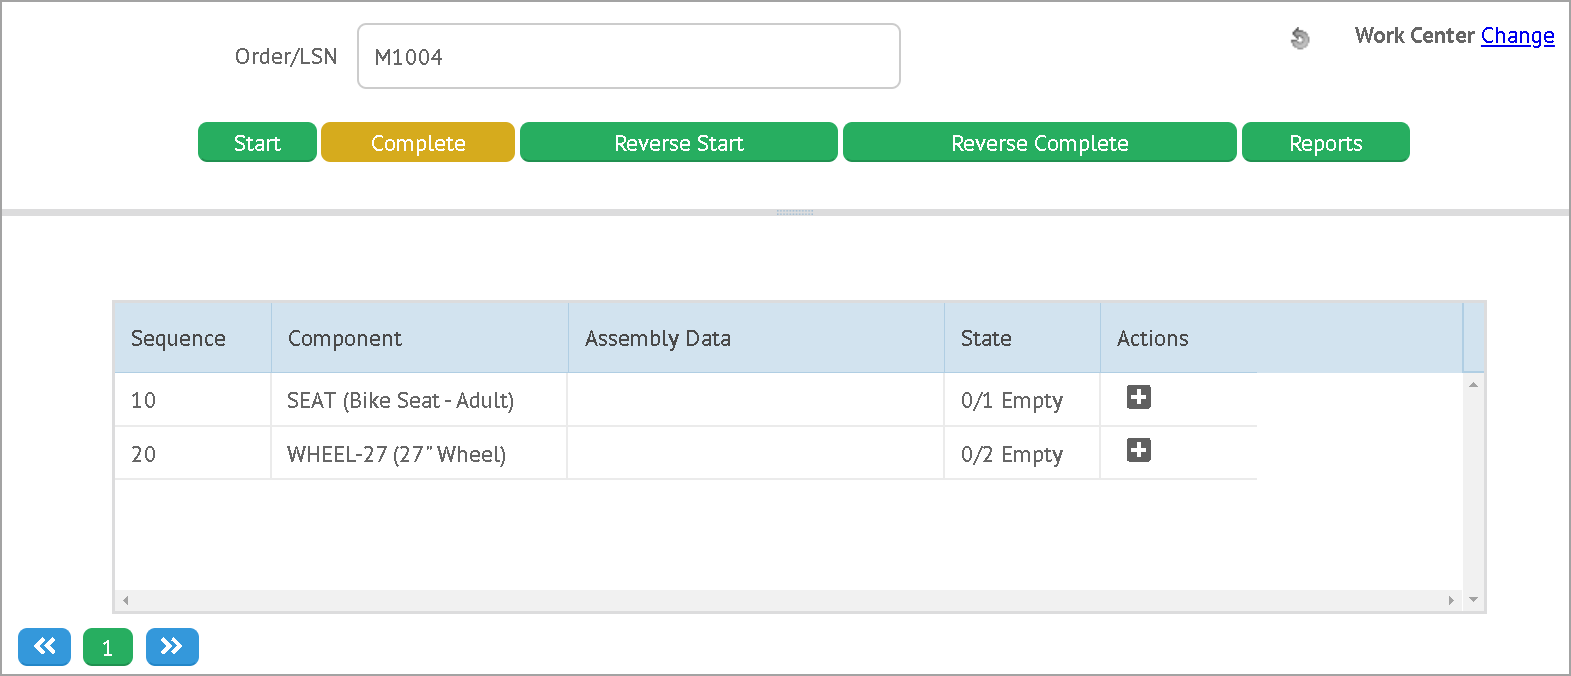 Figure 21. Manager Assembly Dashboard
This dashboard provides the assembly activity in the second panel. This allows you to see and alter the components assembled on the order.
Start the Order
-
Enter your order in the dashboard.
-
Press the Start button. The started message will be displayed:
 Figure 22. Order Started
Assemble Components
Next, you will assemble two components into your bike assembly.
-
Press the
 button
on the SEAT component. This displays the Add Component dialog:
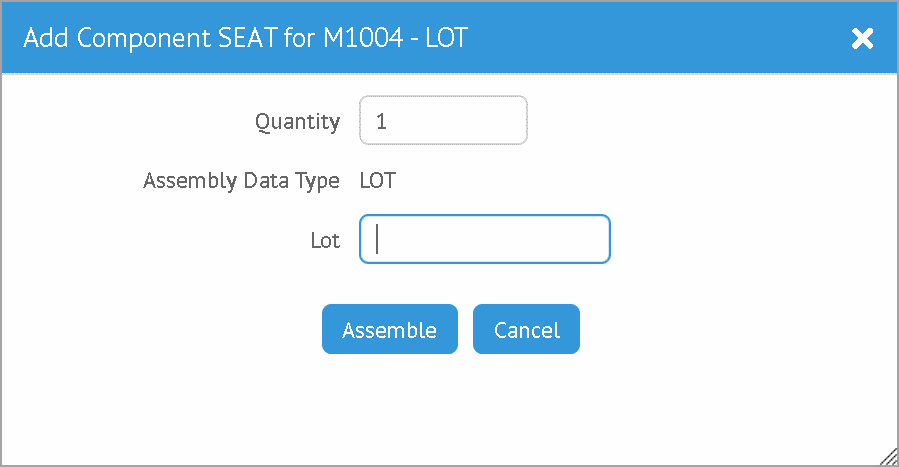 Figure 23. Add Component Dialog
 -
Enter a lot (e.g. 'LOT869375534') and press the Assemble button. This will update the component list on the dashboard with the new status.
-
Repeat this assembly process for the WHEEL-27 component. This will show the order as fully assembled:
 Figure 24. Add Component Dialog
This displays all components as assembled. From this list, you can also remove components as needed.
Display Order History
-
Display the dashboard (see Display the Dashboard).
-
Select the order.
-
Press the Reports button.
-
Press the OrderHistory report button. This displays the Order History Report.
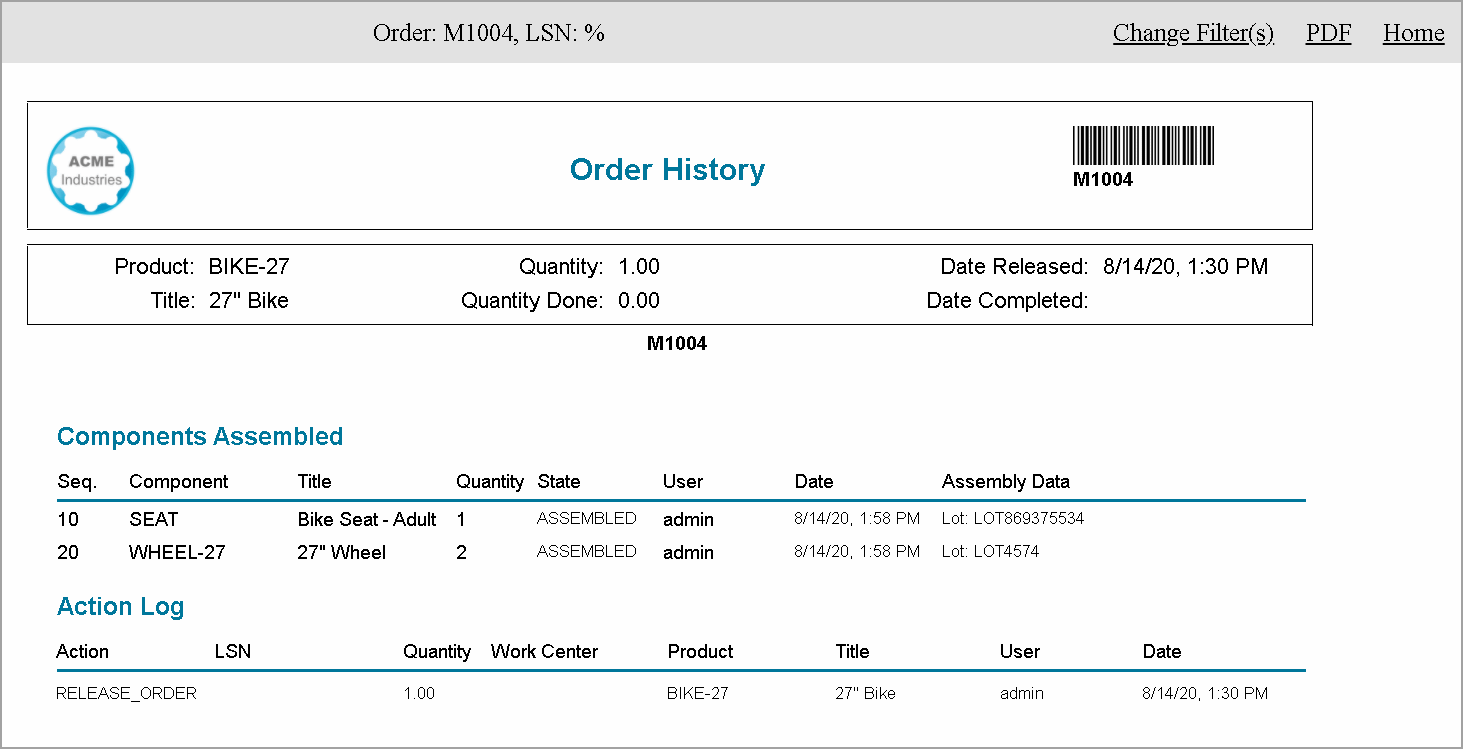 Figure 25. Order History Report - Components
This Order History Report shows the component history details. Note the LOT information entered during assembly.
Search for Component Usage
-
Display the Global Search page from the Search Task Menu .
-
Enter the LOT you used above in Assemble Components and press Search. This displays the order you used:
 Figure 26. Search Component
Clicking on this link will take you to the order show page:
 Figure 27. Show Order - Components
 -
Click on the Components tab to see the component(s) assembled.
Scan Dashboard
Setup Define a Product Create and Release the Order Print Traveller for Barcode Scanner Start the Order Assemble Components Complete the Order Display Order History
This tutorial covers assembly of components into an order using the barcode-scan oriented dashboard. See Assembly for details on how to assemble with just keyboard input.
Setup
Some setup is needed for this tutorial. You will need to follow these steps:
-
Create a Dashboard (Operator Assembly).
-
Configure your barcode scanner to send the data to the browser as keyboard input.
-
Configure your barcode scanner to send a TAB character as the suffix after the data is sent.
If you don’t have a barcode scanner, then you can simulate the scanner’s behavior by typing in the values using a keyboard, followed bya TAB key. The dashboard will display the text as you type.
Define product
Next, you will need to define a product with some components. If you followed the Create a Dashboard steps above, then these products will be created by the demo data loading step:

The Bill of Material for the product BIKE-27 will require two components:
-
SEAT - Quantity 1 - Data Collected on Assembly: LOT.
-
WHEEL-27 - Quantity 2 - Data Collected on Assembly: LOT.
You can create your own product structure for this demo if you like, but the screenshots below will use the above structure.
Create and Release the Order
Now, you need to create an Order.
-
You will need to open the Order List page using the Task Menu .
-
To create a new order, press the
 button. This displays the Create Order page:
 Figure 29. Create Order
 -
Fill in the required fields (marked with "*") and select the
Productyou created above (BIKE-27). Make sure theOverall Statusis set to Ready. -
Press the
 button.
This displays the order in the Show Order page:
 Figure 30. Show Order
The order has been created, but is not yet released to production.
-
Press the
 button
(on the far right side of the toolbar).
This displays confirmation message:
 Figure 31. Order Released
Print Traveller for Barcode Scanner
Now, you can optionally print a traveller document for easy barcode-scanning. For this, we will use the Manager Assembly dashboard:
-
Open the Manager dashboard using the Task Menu :
 Figure 32. Manager Dashboard
This dashboard provides access to the Reports.
-
Select the order.
-
Press the Reports button.
-
Press the Traveller report button. This displays the Traveller Report:
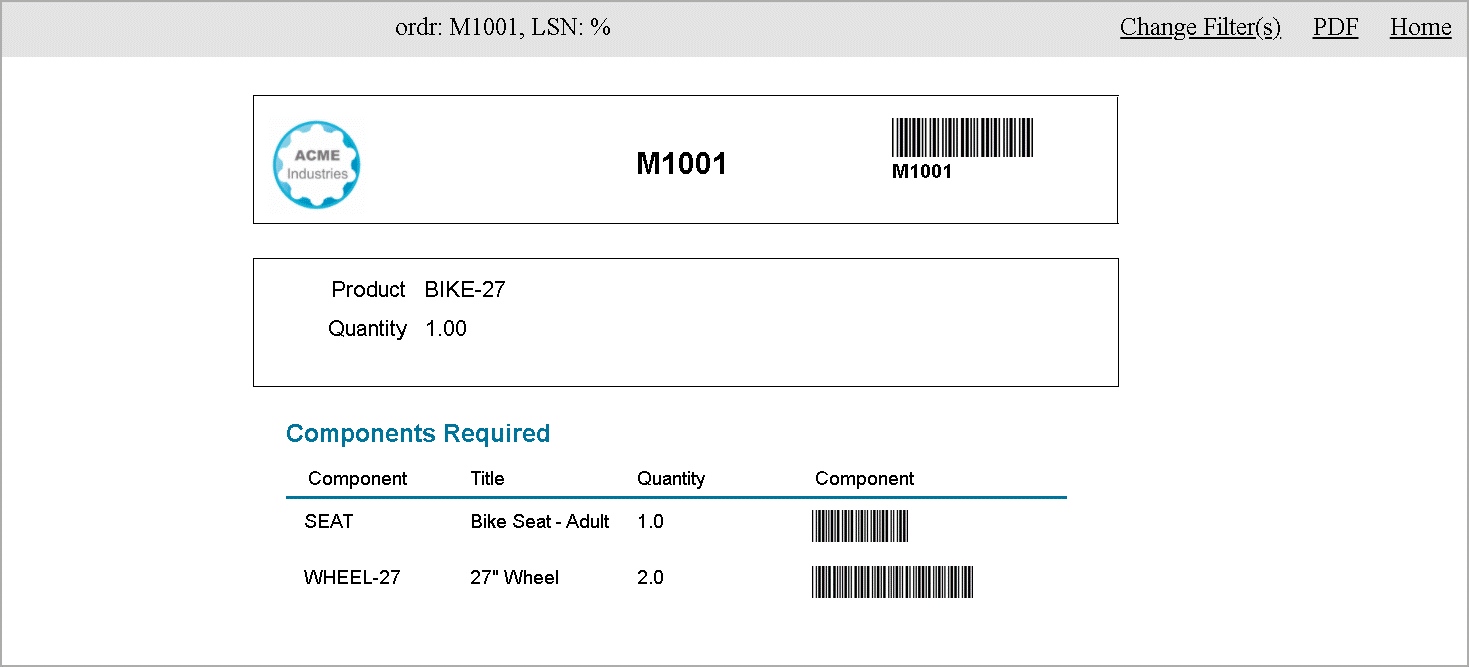 Figure 33. Traveller Report
This Traveller report shows the components required with a barcode for the component. On the second page of the traveller, some sample barcodes are printed to demonstrate the supported Barcode Formats . You can create your own barcodes using online sites such as www.onlinelabels.com. The sample components look like this:
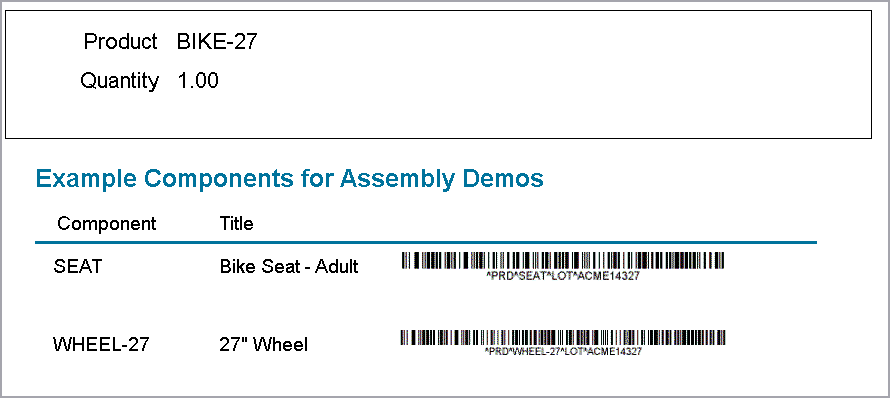 Figure 34. Traveller - Sample Components
 -
Print this from the web-page or as a PDF.
Start the Order
Next, you will switch to the Operator Assembly dashboard, which is a barcode scanner oriented dashboard:
-
Open the Operator Assembly dashboard using the Task Menu :
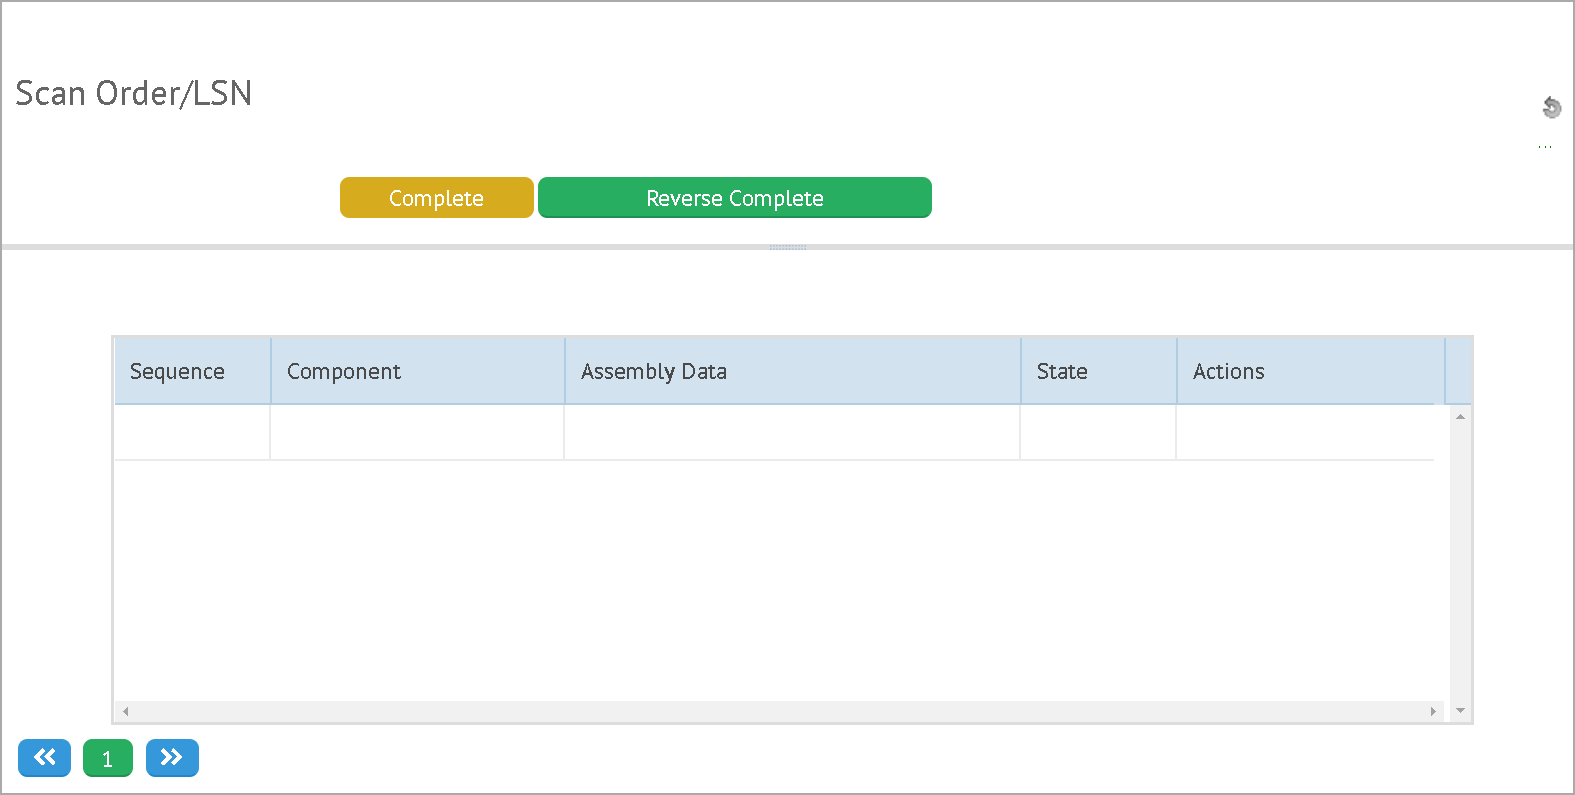 Figure 35. Operator Assembly Dashboard
 -
Scan the order ID (e.g. M1005 in the example below) to start work on the order. The status is changed to In Work and the component list is displayed:
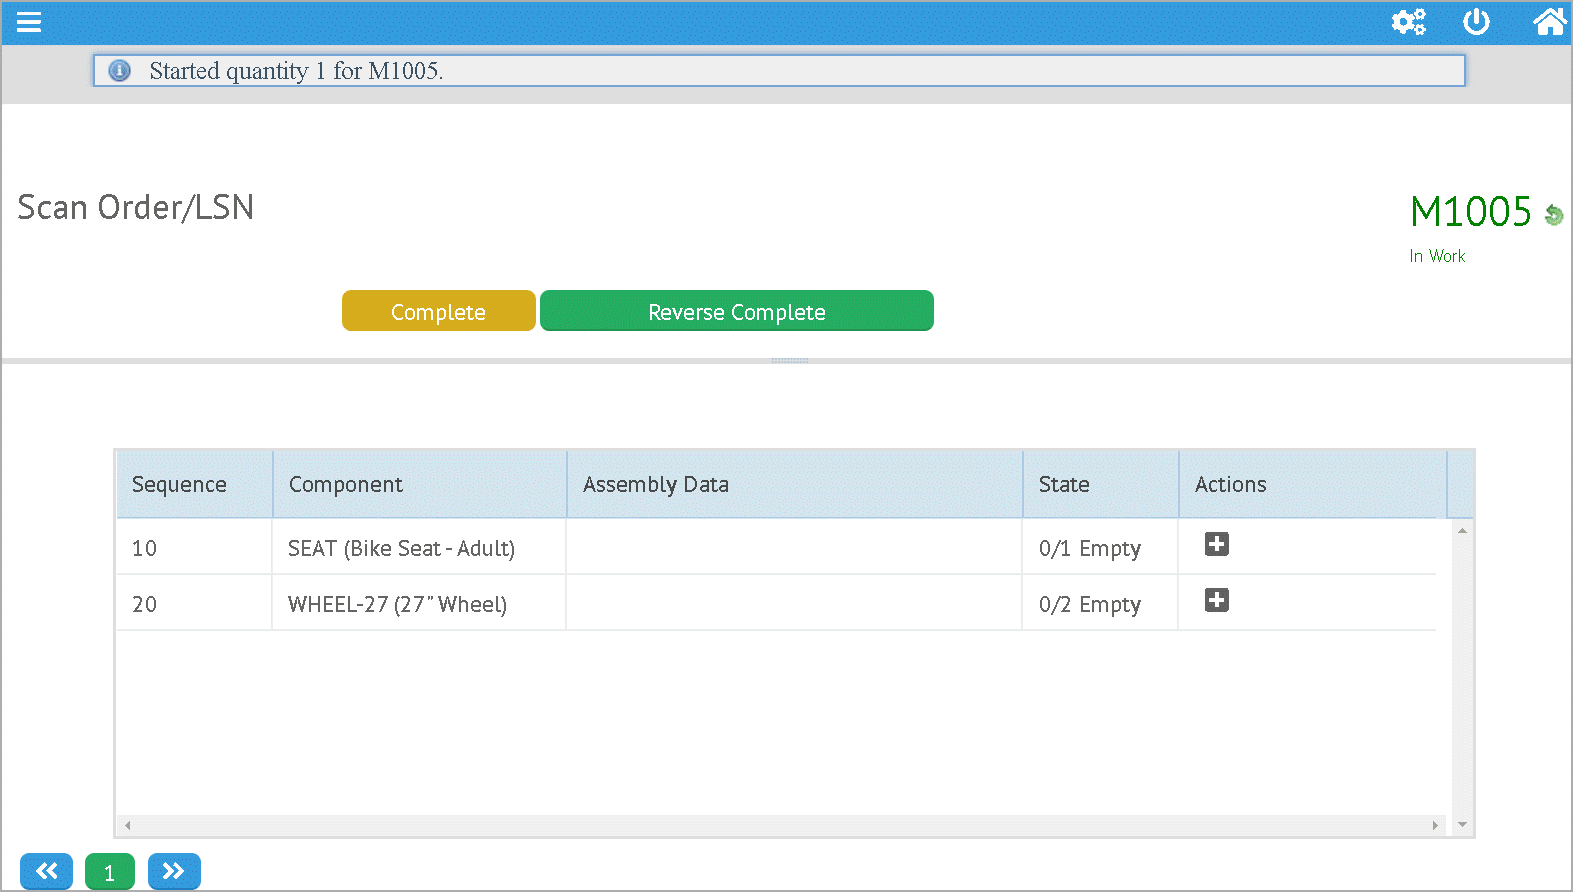 Figure 36. Operator Assembly Dashboard - Started
Assemble Components
Now, you will assemble some components using the sample components from the traveller:
-
Scan the first sample component (SEAT) from the traveller’s second page:
 Figure 37. Traveller - Sample Components
 -
Scan the second sample component (WHEEL-27) from the traveller’s second page: This will assemble the components with the dummy lot: ACME14327. (Both components have the same dummy lot in the traveller report).
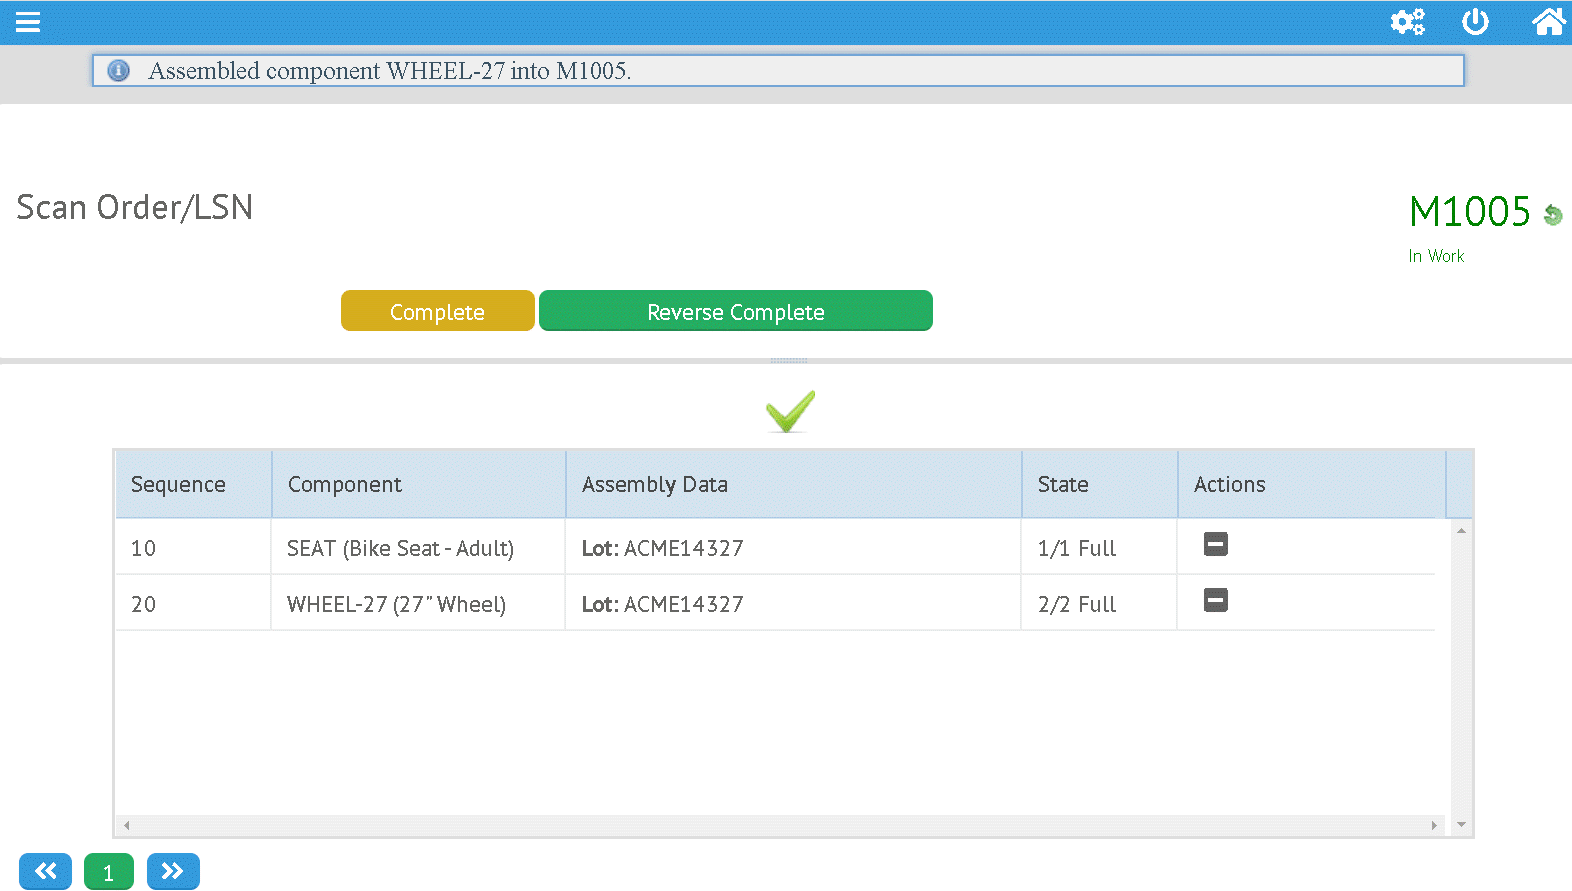 Figure 38. Scan Dashboard - Assembled Components
 -
Alternative: You could also just scan the component (e.g. SEAT) and then enter the lot in the dialog:
 Figure 39. Add Component Dialog
Complete the Order
Next, you will complete work on the order by just scanning the order a second time:
-
Scan the order ID (e.g. M1005 in the example below) to complete work on the order. The status is changed to …:
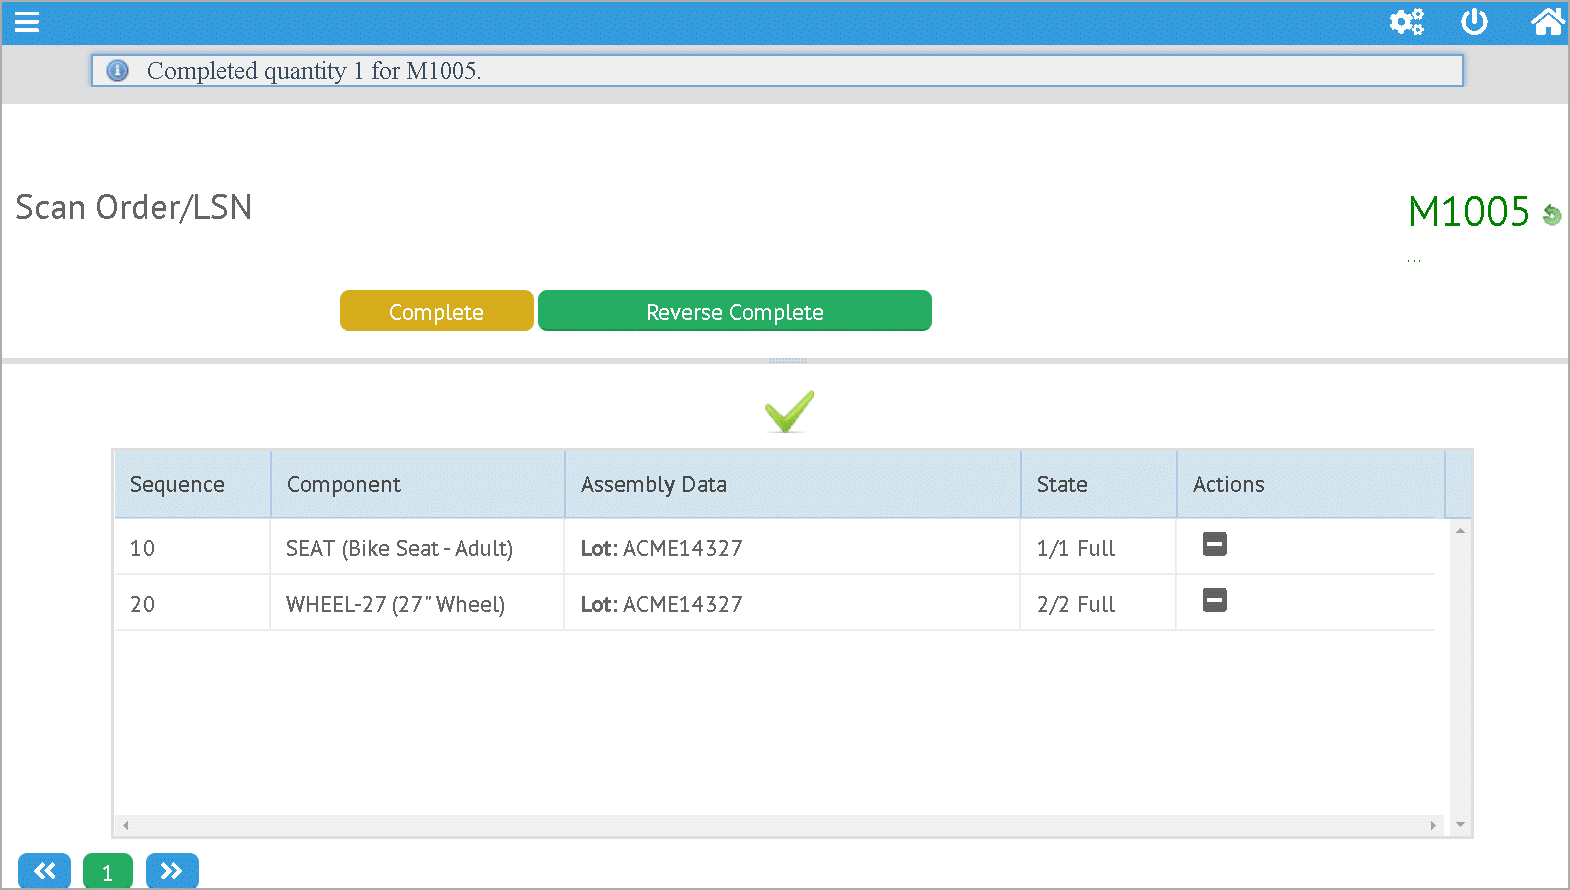 Figure 40. Operator Assembly Dashboard - Completed
Display Order History
-
Display the Manager dashboard (see Print Traveller for Barcode Scanner).
-
Select the order.
-
Press the Reports button.
-
Press the OrderHistory report button. This displays the Order History Report.
 Figure 41. Order History Report - Components
This Order History Report shows the component history details. Note the LOT information entered during assembly.
asciidoctor-version |
2.0.10 |
safe-mode-name |
unsafe |
docdir |
/home/runner/work/simplemes-core/simplemes-core/mes/src/main/docs/asciidoc |
docfile |
/home/runner/work/simplemes-core/simplemes-core/mes/src/main/docs/asciidoc/tutorial.adoc |
doctype |
book |
imagesdir-build |
images |
imagesdir-src |
images |
imagesdir |
images |